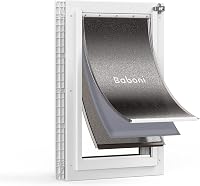
How to Install a Dog Door in a Screen Door
To install a dog door in a screen door, position its frame low on the screen, secure the frame halves, then cut the mesh inside the frame if the model requires it. Check the door’s instructions first, since some screen doors use a different attachment method.
On this page (6 sections)
- What should you check before installing a dog door in a screen door?
- How do you install a dog door in a screen door?
- Which dog door suits your screen and pet?
- How do you check the fit after installation?
- Should you install a pet door in a storm door instead?
- What is the safest way to finish the installation?
To install a dog door in a screen door, fit the frame low on the screen, secure it as directed, and cut the mesh only if the model calls for it. Measure your pet and screen first, then test the flap before letting your dog use it.
A screen door pet flap gives a dog a way through while the main door stays closed. The installation method depends on the frame, screen material, and instructions for the model you choose.
What should you check before installing a dog door in a screen door?
Check the screen type, frame condition, and flap size before you mark a cut. A weak or damaged screen may not hold a pet door securely.
Read the instructions for compatible screen materials and thickness. For example, Ownpets describes compatibility with metal, fiberglass, and vinyl-coated screens from 0.25 to 0.5 inches thick; PetSafe says its model works with most metal or vinyl-coated fiber screens.
Measure your dog at the shoulders and chest, then compare those measurements with the opening. Our guide to measuring your dog and door for a pet door explains what to check before picking a size.
How do you install a dog door in a screen door?
Position the frame, secure both sides, and cut the mesh only after the frame is aligned if the instructions call for it. Keep the opening low and clear of handles, rails, and other hardware.
- Remove the screen door if the instructions recommend working on a flat surface.
- Mark a low position that gives your dog room to pass and leaves the door hardware clear.
- Place the frame halves on opposite sides of the screen, following the model's instructions.
- Align and fasten the frame securely.
- Trim the mesh inside the frame only if directed.
- Fit the flap, then open and close it by hand to check for snags.
CEESC's installation steps say to place the frames on opposite sides of the screen, align the pins, tighten the screws and nuts, then trim the mesh along the frame's inner edge. It also instructs you to bend the top edge of the door and snap it into place.
Don't assume every model uses that same sequence. PetSafe describes its screen door as snapping into an existing screen, while the Ownpets model is described as tool-free; follow the instructions that come with your chosen door.
Which tools do you need?
Use only the tools and fasteners required by the door's instructions. CEESC's steps use a knife to trim the screen after the frame is secured, while Ownpets describes a tool-free installation.
Keep a cutting tool pointed away from your hands and the screen door frame. If the instructions don't clearly show where to cut, pause and contact the manufacturer before making an opening.
Which dog door suits your screen and pet?
Choose a model based on the opening size, screen compatibility, and how you want to control access. These three options attach to screens and have different frame or flap details.
The Ownpets screen door has a 12 x 14 in opening, a magnetic flap, and locks on both sides. Ownpets describes it for screen thicknesses from 0.25 to 0.5 inches and pets up to 80 lb.
The PetSafe small screen door has an 8 x 9.25 in flap opening and is intended for pets under 30 lb. It has a high-impact plastic frame, mesh described as puncture and tear-resistant, and sliding locks.
CEESC has a 12.2 x 14.56 in inner opening and two switch modes: allow passage both ways or lock the flap. Its instructions describe fastening frame halves on opposite sides of the screen before trimming the mesh.
Compare the opening against your dog's measurements rather than choosing by the product's size label alone. For other frame types and placements, see how to choose a dog door and our screen door flap guide.
How do you check the fit after installation?
Test the frame and flap by hand before asking your dog to use the door. The frame should stay in place, and the flap should swing without catching on the mesh.
Look for loose fasteners, exposed cut mesh, or a flap that does not return to its closed position. Fix snags or movement according to the instructions before introducing your dog to the opening.
Guide your dog through slowly with the flap held open at first. Then let the flap move while you supervise, so you can see whether your pet can push through without catching a paw or collar.
If the screen tears or the frame shifts, stop using the opening until you can secure or replace the affected parts. A pet door isn't a substitute for a sturdy, properly fitted screen door.
Should you install a pet door in a storm door instead?
A screen door flap is for a screen panel, while a storm door may need a model made for its panel and construction. Check compatibility before cutting either door.
If your setup has a separate storm door, read how to install a pet door in a storm door for the considerations that apply to that installation. If your dog door will go in a solid door, compare the options in our pet door guide.
What is the safest way to finish the installation?
For a dog door in a screen door, measure first, follow the model's installation steps, and check the frame and flap before use. Choose a screen-compatible model with an opening your dog can pass through comfortably.
Use CEESC's frame-first cutting sequence only for a model whose instructions call for it. For an easier snap-in style, compare the PetSafe and Ownpets screen doors, then check their opening dimensions and compatible screen materials before installation.
Frequently asked questions
Can you install a dog door in any screen door?
No. Check the pet door's instructions for compatible screen materials and thickness, and inspect your screen door for a suitable, sturdy area.
The Ownpets model is described for metal, fiberglass, and vinyl-coated screens 0.25 to 0.5 inches thick, while PetSafe says its model works with most metal or vinyl-coated fiber screens.
Do you cut the screen before or after fitting the frame?
Follow the specific model's instructions. CEESC's steps place the frame halves on opposite sides, align and tighten them, then use the frame's inner edge as a guide to trim the screen.
Other models may attach differently, so don't cut until you know where the opening belongs.
How high should a dog door go in a screen door?
Set the opening low enough for your dog to step through without crouching or jumping, while keeping the frame clear of the floor and door hardware. Ownpets suggests mounting its model 6 to 9 inches off the floor.
Measure your dog's height and the flap opening before choosing a position.
Does a screen door pet flap keep bugs out?
A flap that closes after your pet passes can reduce the open gap, but it doesn't make the screen door bugproof. Ownpets and CEESC describe magnetic flap closures.
Check that the flap swings freely and closes after installation, and repair any loose or torn mesh around the frame.